The Blakemore Tube
The Case:
A 54-year-old male with a history of advanced cirrhosis presents as a transfer from an outside hospital with upper GI bleeding. The patient had banding of esophageal varices 2 weeks prior and was at a rehab facility when he developed several episodes of gross hematemesis. He presented to an outside hospital where he was intubated for airway protection and transferred to RIH for definitive management. The bleeding had stopped prior to transfer but he then started pouring gross blood from his mouth as he was rolling in to the CC bay.
GI was called immediately but the fellow was having trouble getting in touch with her attending. The decision was made to temporize the bleeding by placing a Blakemore tube.
BUT HOW?
THE PREP
1. Obtain the following materials:
A: Blakemore tube: Sitting on the shelf in CC alley.

Image 1: Critical Care Cart at RIH
B: 2 three-way stop cocks, 2 christmas tree adapters (image 2), 1 double christmas tree adapter (image 3): Supply should have placed these in the box with the Blakemore.
C: 60cc syringe
D: Lots of lube
E: Kerlix gauze
F: Posey manometer (image 4): Call respiratory for this.


Image 2-4 (in order): Christmas tree adapter, double christmas tree adapter, posey manometer.
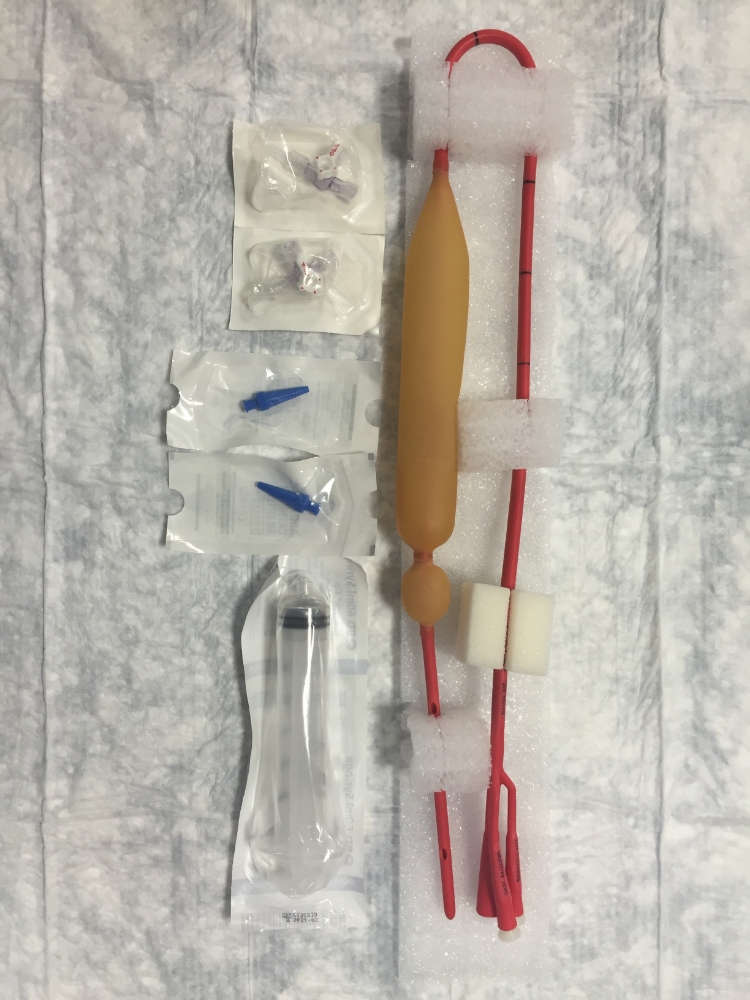
Image 5: Gathering Supplies
2. Remove the white caps (image 6) from the ports and assemble the Christmas tree adapters and triple stopcocks into the esophageal and gastric ports.
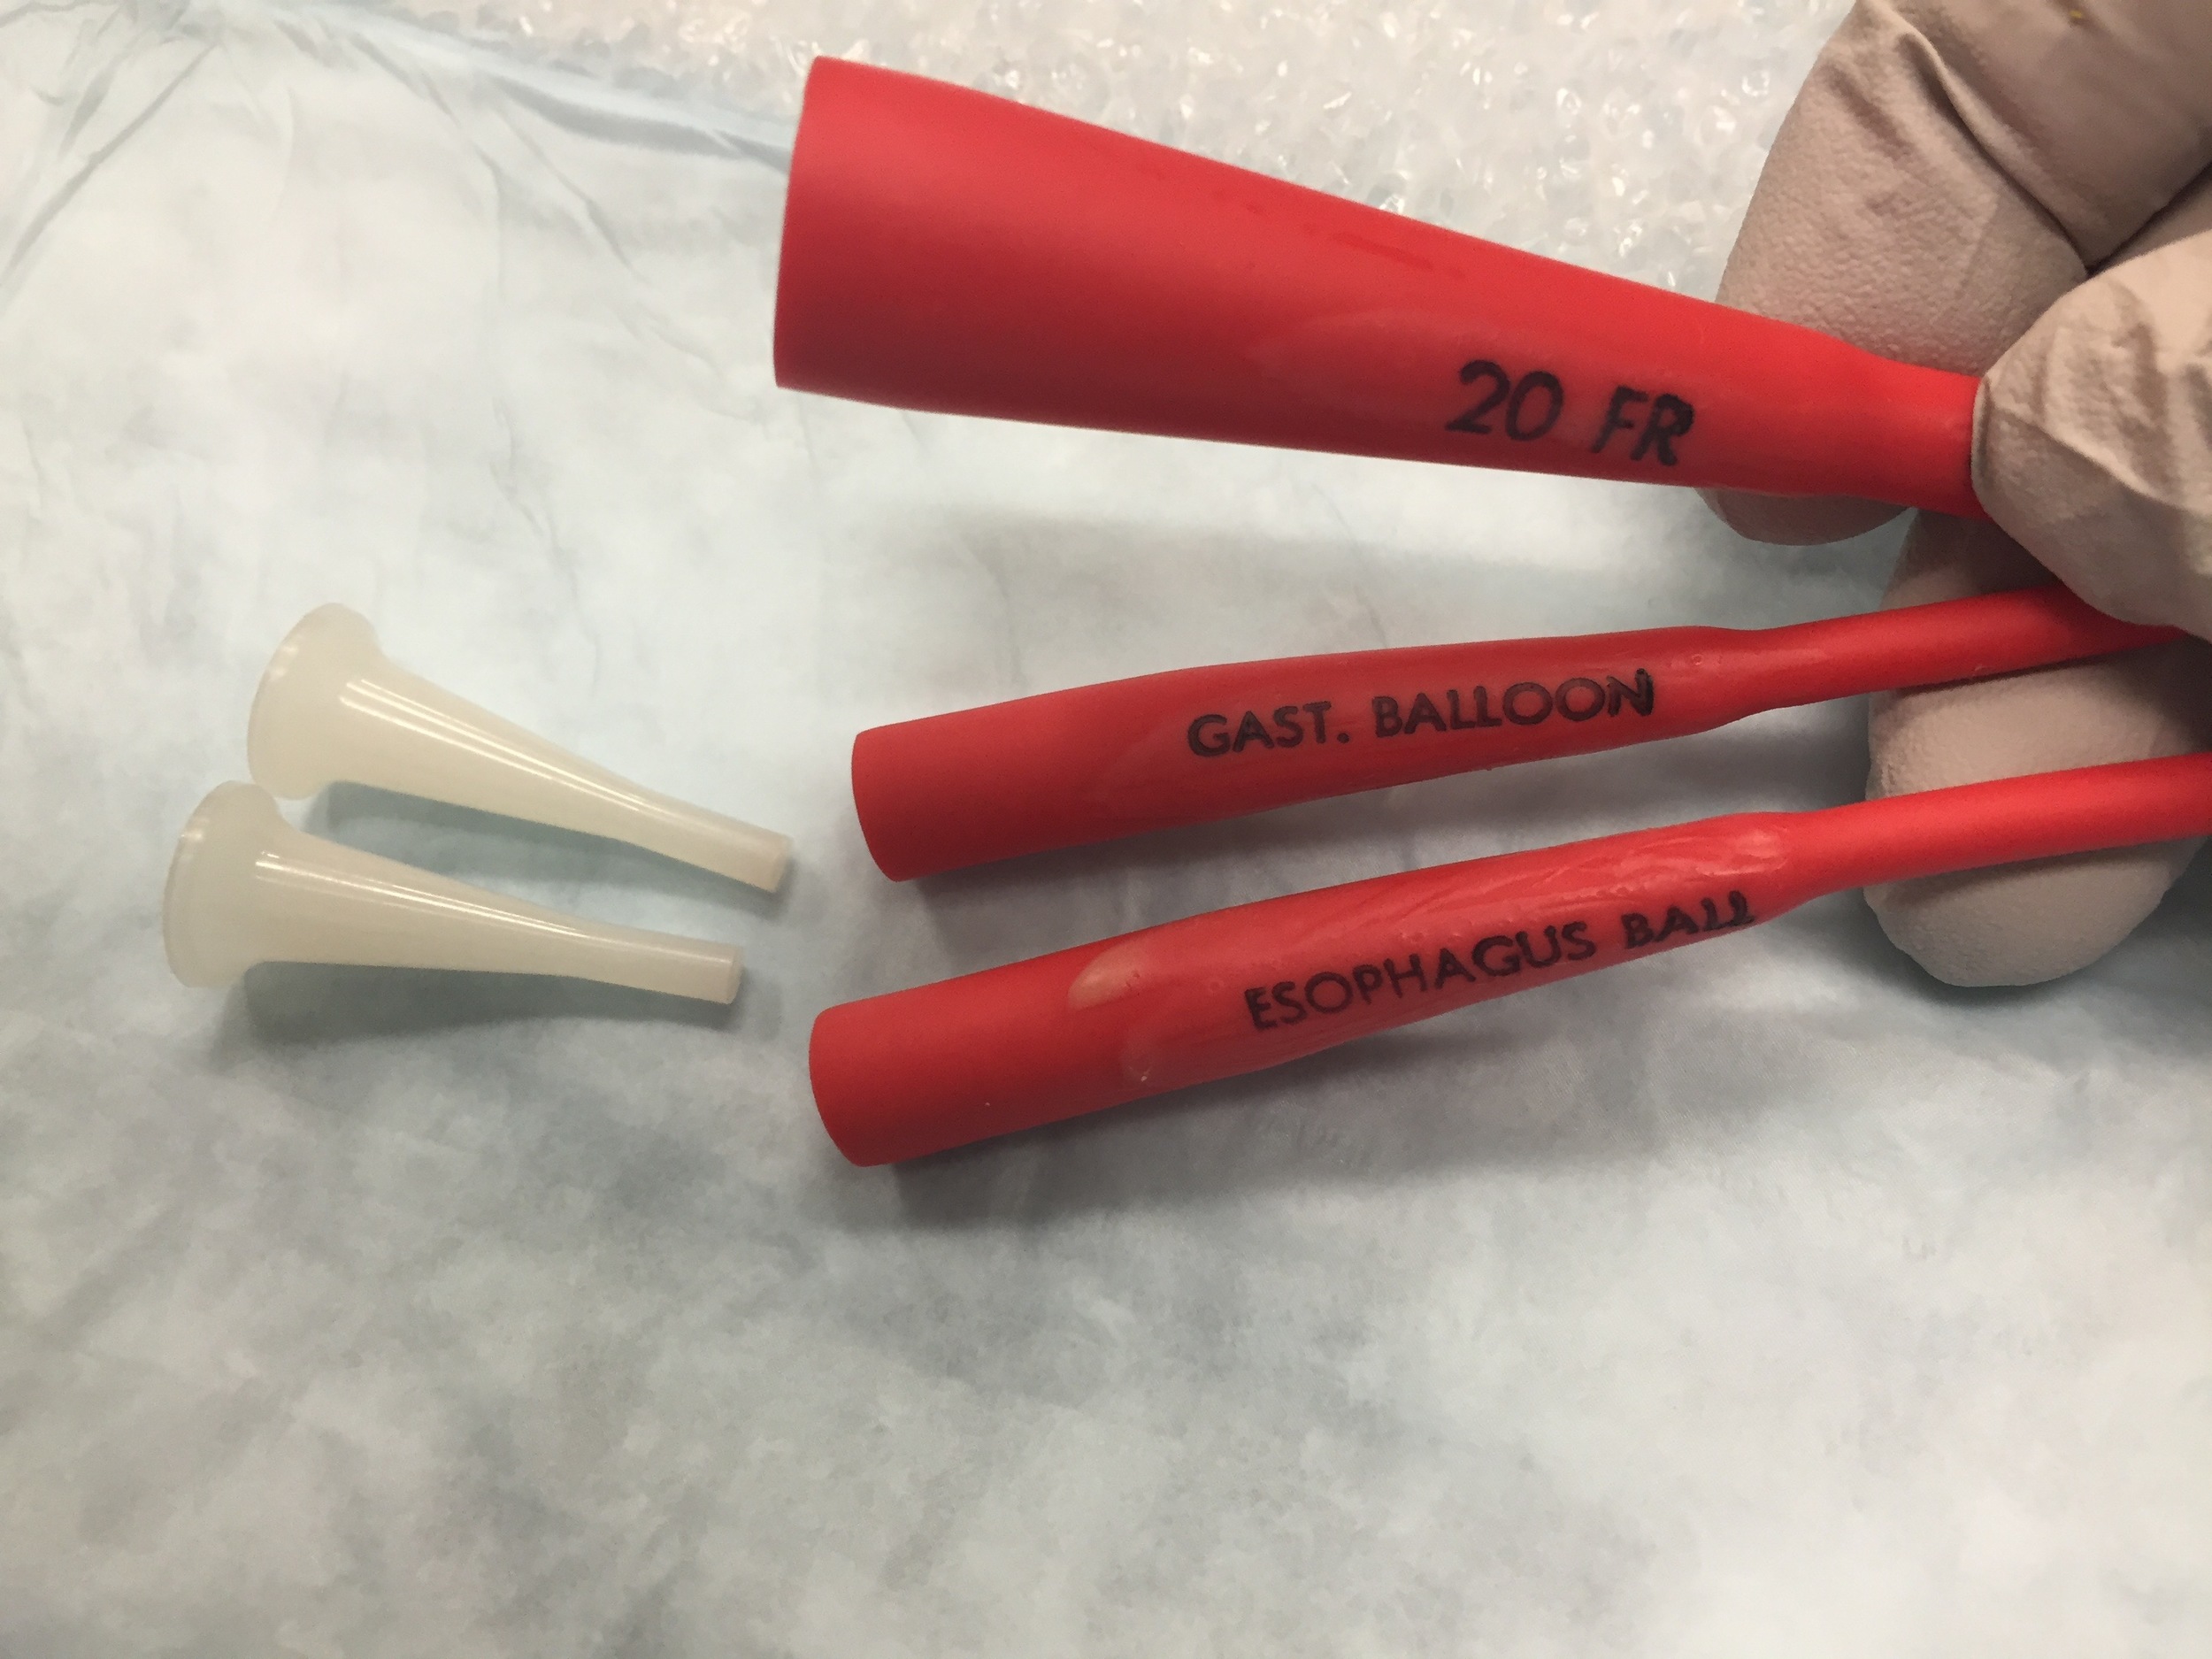
Image 6: Remove the white caps.

Image 7: Adapters and stopcocks in place.
3. Test the balloons and then deflate completely and turn stop cocks so that the "off" is facing the ports. Lube up the entire length of both balloons.
THE PLACEMENT
1. Pass the tube through the nose if awake or the mouth if intubated. If going through the nose, you will meet a decent amount of resistance as the esophageal balloon passes through the nose.
2. Auscultate the stomach and push air through the “Gast Asp” port to ensure you are not in the lungs.
3. IMPORTANT STEP: Fill the gastric port with ONLY 50cc of air (image 8). Get an x-ray to confirm balloon is in the stomach and not the esophagus (image 9).
Update: Of note, 50 cc of air in the balloon can still damage the esophagus. We now recommend that the provider should note the distance between the top of the gastric balloon and the tip of the tube and make sure the tube is at least that far below the diaphragm before inflating (as seen on a CXR). Following this, they should now inflate the 50 cc of air (followed by another CXR to truly confirm gastric placement).

Image 8: Inflate 50cc of air into the gastric balloon.
4. Once confirmed by x-ray, add another 200cc of air to the gastric balloon (image 10). This should be followed by one last CXR to truly confirm adequate placement.

Image 10: An additional 200 cc into the gastric balloon.
5. Pull traction on the tube, tie using kerlix to a 1L bag of saline and drape over an IV pole (image 11 and 12). This pulls the gastric balloon into the GE junction to tamponade any gastric bleeding.

Image 11: 1 liter saline bag tied to the Blakemore tube.
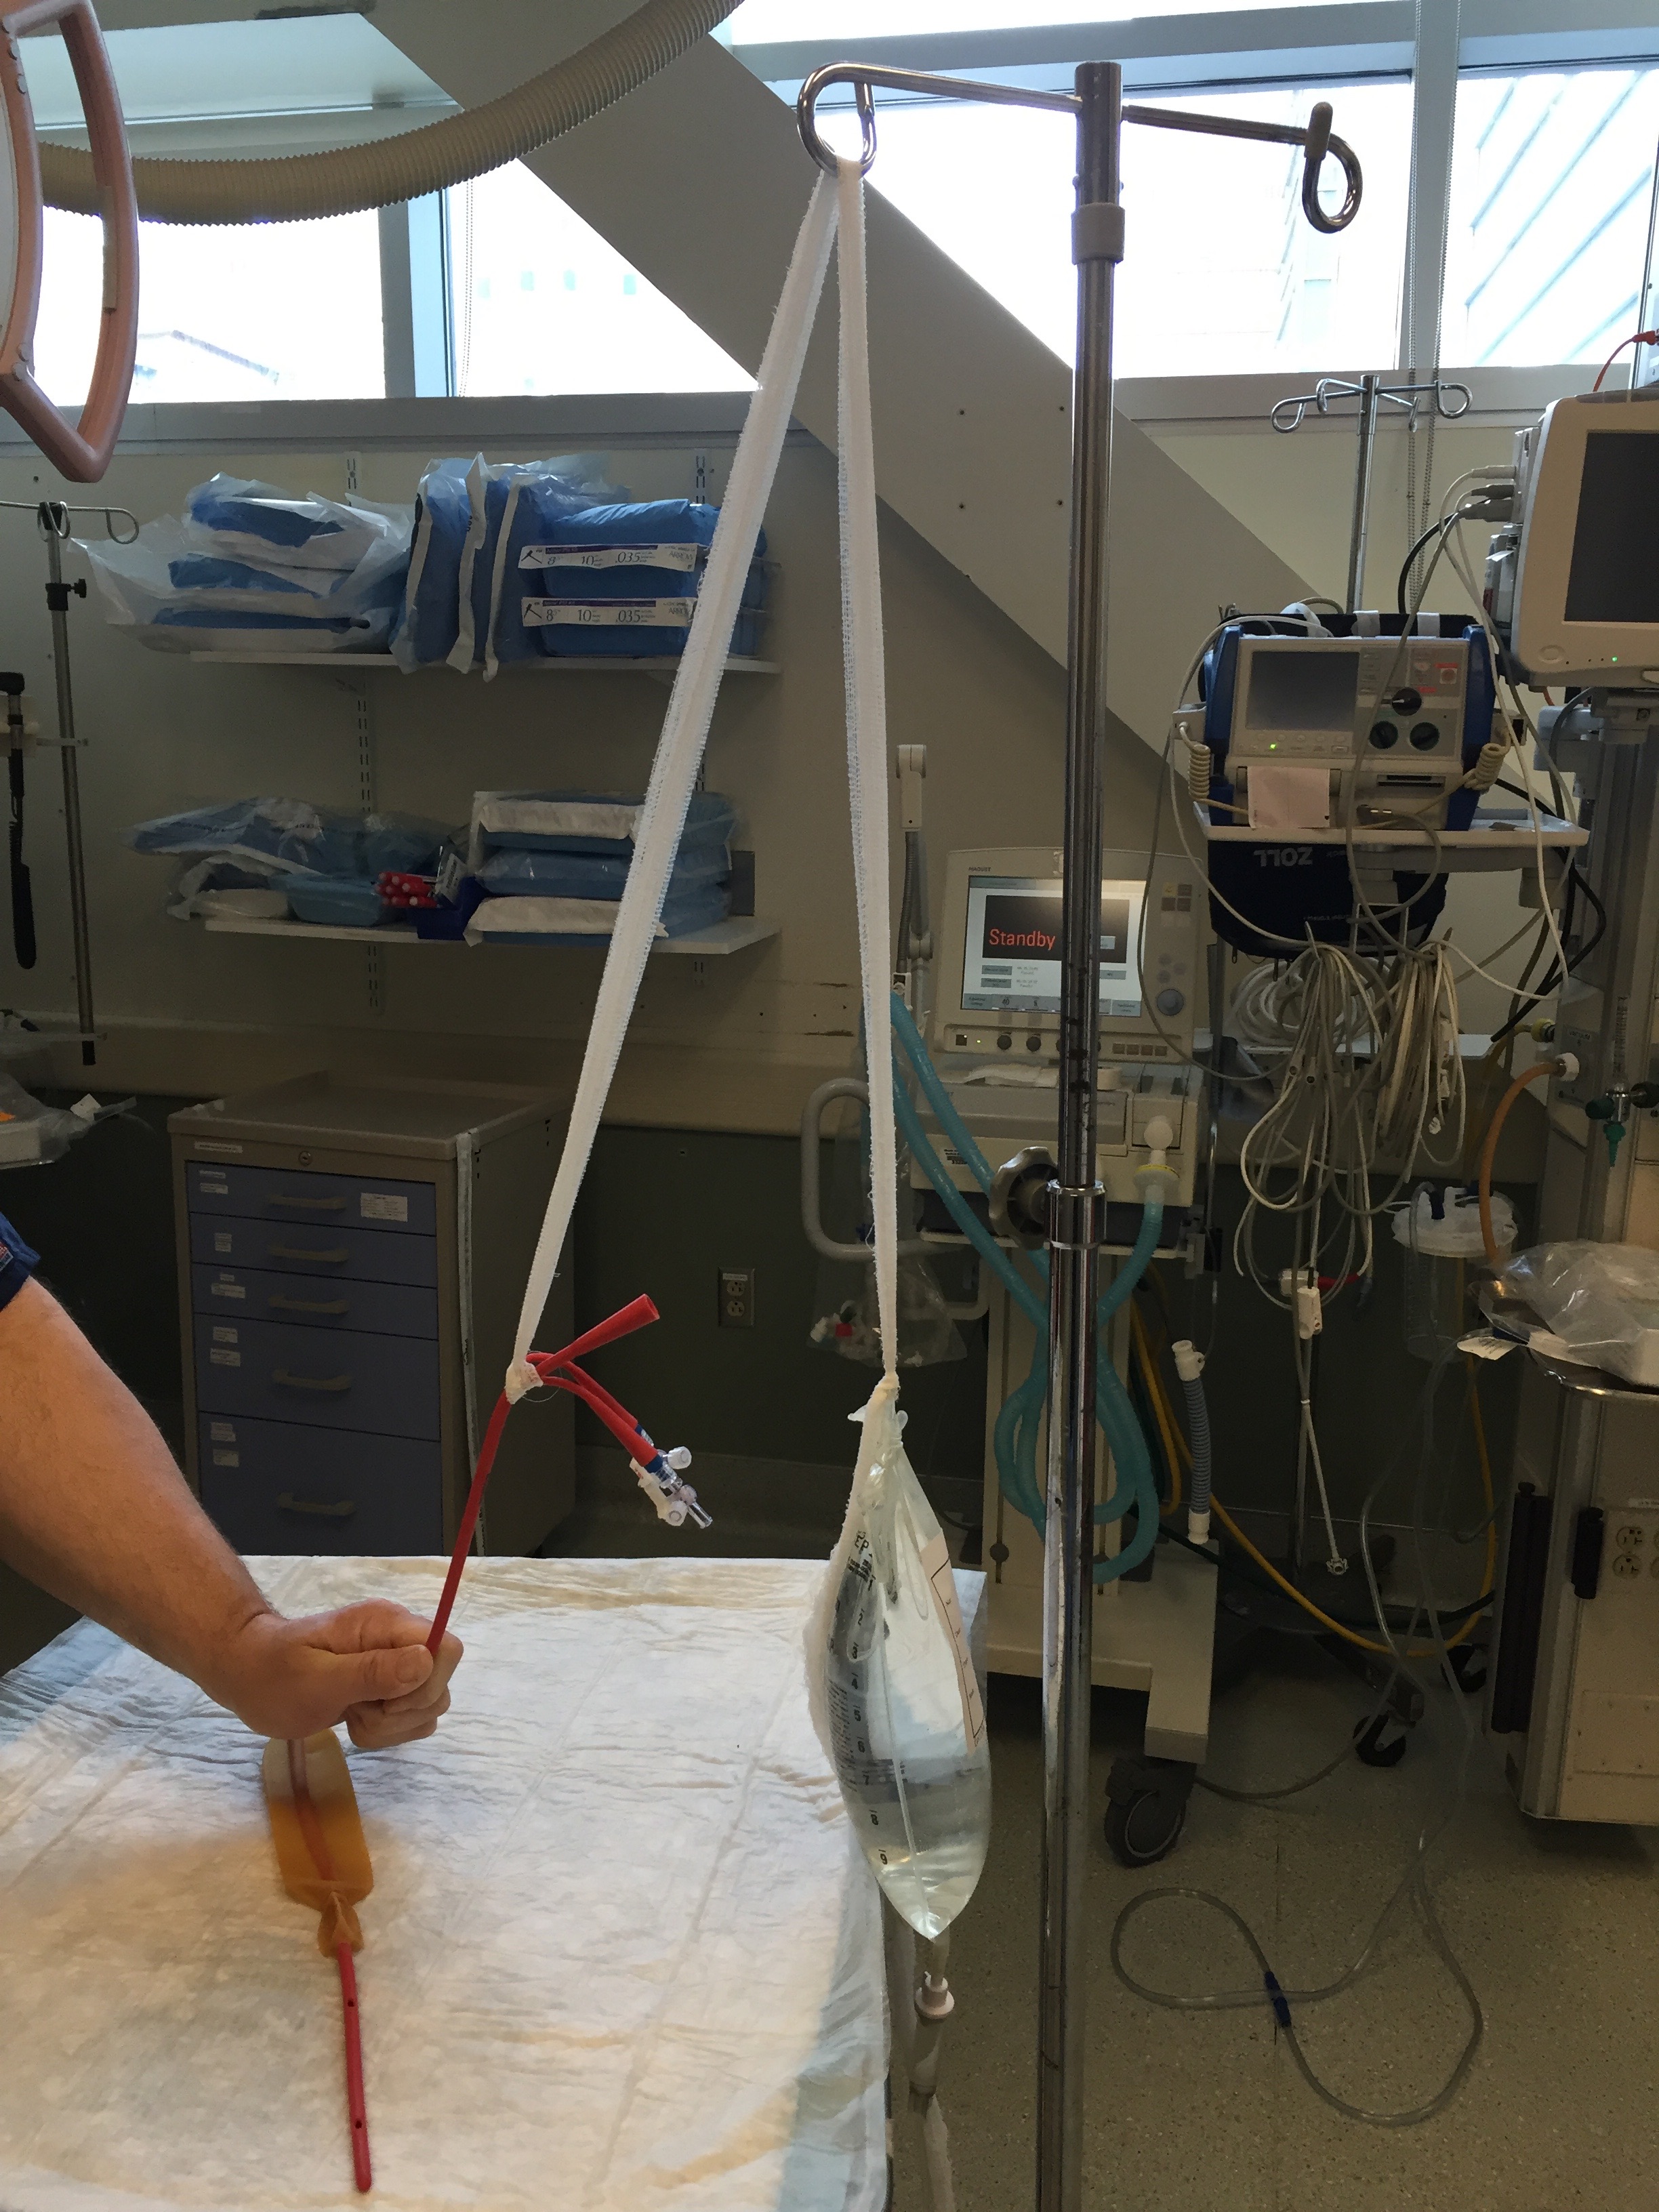
Image 12: Draped over the IV pole.
6. DO NOT fill the esophageal balloon unless there is continued bleeding which would indicate that the bleeding is from the esophagus. The esophageal balloon is filled to a goal pressure, not volume.
A: Connect the posey manometer to the esophageal stop cock.

Image 13: Posey manometer connected to the esophageal stopcock.
B: Pump to a pressure of 40 mmHg.

Image 14: Pressure of 40 mmHg.
C: Turn the stop cock so the "off" is facing towards the port.
7. Can use the double Christmas tree adapter to connect the gastric aspiration port to suction.
8. Congratulate yourself and get GI to come on down!