Ankle Arthrocentesis in the Emergency Department
CASE
A 51 year-old female, with a past medical history of HIV compliant with her HAART medications, presented with acute atraumatic left ankle pain for the past day. She denied fever, chills, overlying skin changes, or other painful joints. She had not had any recent procedures, suffered any puncture wounds or bites, and had not had any previous ankle injuries or surgeries. The pain was worse with any type of movement and she stated that she could “hardly move the ankle.” She was able to ambulate, albeit with significant difficulty. She had not experienced similar symptoms in the past. There was a remote history of intravenous drug use, but not in the last 30 years.
Vitals were within normal limits. Her physical exam was significant for moderate tenderness to palpation and swelling over the lateral malleolus, decreased passive and active range of motion of the left ankle, and there was no overlying warmth or erythema. She was able to bear weight with significant distress.
Given patient’s presentation and immunocompromised condition, basic labs were obtained, including complete blood count (CBC), erythrocyte sedimentation rate (ESR), and C-reactive protein (CRP), as well as an x-ray of the left ankle (Figure 1). CBC was within normal limits, while CRP was mildly elevated at 16.67 and the ESR was 41.
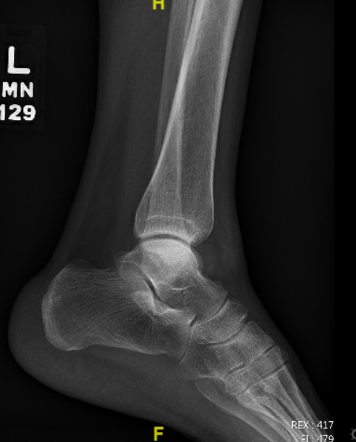
Figure 1. X-ray of the patient’s right ankle.
DIAGNOSIS
The differential included septic (bacterial, viral, fungal) versus crystal-induced arthritis (gout, pseudogout), as well as autoimmune etiologies, such as rheumatoid arthritis and lupus.[1]
DISCUSSION
Background
When a patient presents to the emergency department with atraumatic monoarticular arthritis, it is important to promptly determine the etiology, because septic arthritis is an orthopedic emergency that can lead to significant morbidity and mortality.[2]
A detailed history and comprehensive diagnostic evaluation are important in the evaluation of monoarticular arthritis. While serologic testing, such as CBC, ESR, and CRP are commonly obtained, they do not allow for definitive diagnosis or distinction between different forms of arthropathy. Rather, synovial fluid collected through arthrocentesis is the gold standard.[3]
The indications to perform an arthrocenteses include evaluation of joint effusion for possible infection, crystal deposition, or hemarthrosis in the setting of trauma. Therapeutic arthrocentesis is not commonly done in the emergency department, except to provide pain relief from a tense effusion, usually of the knee.[4] There are no absolute contraindications to arthrocentesis. Relative contraindications include overlying cellulitis, anticoagulation, adjacent osteomyelitis, and impending joint replacement surgery.[4] The evidence for these relative contraindications is variable, and some experts argue that the benefit of diagnosing septic arthritis outweighs the risks.[2]
Performing an Ankle Arthrocentesis
After obtaining consent, collect supplies for the procedure, including sterile gloves, chlorohexidine or betadine for sterile preparation, lidocaine 1% with or without epinephrine, a 25 or 27 gauge needle for lidocaine administration, and 18 to 22 gauge needle attached to a 10 mL syringe for aspiration.[4] In terms of position, the patient may be seated or supine with the knee flexed to 90 degrees, and the ankle plantar flexed so that the foot lies flat against the bed.

Figure 2. Landmarks and Approaches to the ankle arthrocentesis.
Various approaches may be used for an ankle arthrocentesis. In the anterolateral approach, the joint line is between the lateral aspect of the extensor digitorum longus (EDL) and the medial aspect of the lateral malleolus (Figure 2, red arrow). Keeping the patient’s foot flat helps to open the joint space. The needle is inserted perpendicular to the shaft of the fibula. This is the preferred approach because it avoids blood vessels (dorsalis pedis and posterior tibial) and nerves (deep peroneal) that run through the medial aspect of the ankle.[4]
With the anteromedial approach, the joint line can be accessed in one of two ways. First via the space between the medial aspect of the extensor hallucis longus (EHL) and the lateral aspect of the tibialis anterior tendon (TA) (Figure 2, blue arrow). Second is through the space between the medial malleolus and the medial border of the tibialis anterior tendon (Figure 2, yellow arrow). The needle should be inserted perpendicular to the shaft of the tibia.[4]
After identifying the approach, clean the site with chlorohexidine or iodine, then anesthetize with lidocaine. First, create a wheal at the skin, then advance the needle along the pathway to numb the intended track of your needle, being sure to aspirate before injecting to ensure you are not in a blood vessel.
Aspirate synovial fluid using an 18 to 22 gauge needle attached to a 10 cc syringe. Insert the needle through the skin wheal and follow the anesthetized tract down to joint space, aspirating as you advance. Once in the joint space you should see fluid enter the syringe. Aspirate as much fluid as possible.
Synovial fluid should be sent for cell count with differential, gram stain and culture, light microscopy for crystals.[3]
Ultrasound-guided Ankle Arthrocentesis
Using landmarks and going in “blind” is the original method for arthrocentesis; however, the availability of point-of-care ultrasound (POCUS) in the emergency department now provides a useful tool to assist with this procedure. Ultrasound has been reported to visualize as little as 2 mL of synovial fluid and has been shown to increase success rates in the emergency department.[4,6]. To perform POCUS for ankle arthrocentesis, use a linear probe. The probe should be longitudinal with the probe marker cephalad and placed above the ankle joint. Move the probe distally until the tibial-talar joint space comes into view.[5] The best location is between the tibialis anterior and the EHL in the anterior recess of the tibiotalar joint.[4] The tibia and talus will be visualized as hyperechoic lines. An effusion will appear as hypoechoic fluid above the talus. Adding color doppler can help identify the locations of the dorsalis pedis artery to avoid vascular injury, as it runs just lateral to the EHL.[5] Once the effusion has been identified the needle should be inserted medially to the EHL into the joint space to aspirate fluid.
CASE RESOLUTION
Synovial fluid analysis showed a nucleated cell count of 12,337, red blood cell count of 5,637, and no crystals were visualized on microscopy. Gram stain was also negative and cultures had no growth after five days. These findings were not consistent with a septic joint or crystal-induced arthropathy. The cause of her pain and effusion remained unclear, despite our work-up in the emergency department.
TAKE-AWAYS
Arthrocentesis is the gold standard to diagnosis of monoarticular arthritis.
Arthrocentesis is a skill that emergency providers must master and utilize.
There are multiple approaches to the ankle arthrocentesis, and ultrasound can aid in determining the best approach for success
Authors:
Kathleen Miller is a second-year Emergency Medicine Resident at Brown University
Jeffrey Feden is an Associate Professor of Emergency Medicine at Brown University and is fellowship-trained in Sports Medicine
REFERENCES
Carpenter CR, Schuur JD, Everett WW, Pines JM. Evidence-based diagnostics: adult septic arthritis [published correction appears in Acad Emerg Med. 2011 Sep;18(9):1011]. Acad Emerg Med. 2011;18(8):781–796. doi:10.1111/j.1553-2712.2011.01121.x
TA Shirtliff ME, Mader JT. Acute septic arthritis. Clin Microbiol Rev. 2002;15(4):527–544. doi:10.1128/cmr.15.4.527-544.2002KE-AWAYS:
Wolfson AB. Harwood-Nuss’ Clinical Practice of Emergency Medicine. Philadelphia, PA: Lippincott Williams & Wilkins. (2005) Pages 732-733
Springer, Brian. “Joint Arthrocentesis in the Emergency Department.” Relias Media - Continuing Medical Education Publishing, 2017, www.reliasmedia.com/articles/141511-joint-arthrocentesis-in-the-emergency-department.
Duanmu, Youyou, et al. “More Tips and Tricks: Ultrasound Guidance for Ankle and Wrist Arthrocentesis.” ACEP // Home Page, 2020, www.acep.org/how-we-serve/sections/emergency-ultrasound/news/dece/more-tips-and-tricks-ultrasound-guidance-for-ankle-and-wrist-arthrocentesis/.
Reach, J. S., Easley, M. E., Chuckpaiwong, B., & Nunley, J. A. (2009). Accuracy of Ultrasound Guided Injections in the Foot and Ankle. Foot & Ankle International, 30(3), 239–242. https://doi.org/10.3113/FAI.2009.0239
Landmarks and Approaches to the ankle arthrocentesis. Digital Image. Ankle Arthrocentesis or Ankle Joint Aspiration. https://boneandspine.com/ankle-arthrocentesis/
Image credit: Ankle Arthrocentesis or Ankle Joint Aspiration. https://boneandspine.com/ankle-arthrocentesis/